Dreambox tour
DISCLAIMER: I’ve modified my DreamBox in a way that may that may void the warranty. Make sure you check with Create Room before you choose to make similar modifiers if you’re concerned. I did contact Create Room to make sure I could safely make one specific modification that would cause a structural change. I was told that it was doable, if I didn’t add the light crown.
My DreamBox in my small office
Thank you for reading this post! I love my DreamBox and I’ve modified it in order to meet my unique needs. I’d like to chat through that first, so you have a better understanding of why I made the modifications that I did.
I first decided to buy a DreamBox for a couple of reasons. My cat is getting older (17 at the time that I wrote this). He can no longer head to the basement to use his litter box. I needed to create a corner in my office where he could do his business on the ground floor of our house (where we spend the vast majority of our time). The second reason was that, post pandemic, we were still working from home quite a bit. It was no longer really acceptable to have a wall of random craft accessories show up in all of my professional videos. I needed a way to keep them in the room but out of sight.
My craft room/office is your average 8x10 bedroom in a 1950s ranch-style house. There’s not a lot of room to begin with, so I had to be smart with the space that I had.
I have several hobbies that I wanted to fit into this box. Primarily, I make resin jewelry that I sell on Etsy. I’ve created a line of stickers that act as frames for those fortunes you get in fortune cookies, and store those in my DreamBox. I paint with acrylics and watercolors as well as dabble in calligraphy. Woodburning, enamel, wire bending, and block printing are all things I’ve explored and have tools for.
There were several goals that I wanted to accomplish when purchasing my DreamBox:
paintbrush holders
I wanted to ensure that ALLLL of my craft stuff & things would fit. I used measurements I’d found online, measured my things, drafted the organization on some graph paper… I wanted to make sure that, if I made this HUGE purchase, it would adequately suit my needs. I also wanted to be able to enforce a rule for myself - if I bought this box, all of my crafts MUST fit in the DreamBox. Everything else would be purged.
I already had a ton of small storage solutions. I’d spent a long time finding the right storage for my needs and it felt wasteful to throw all of that away. I deal in tiny little pieces and didn’t want to purchase new storage if I could help it.
I was craving a modern apothecary look with the DreamBox. Since I had little small drawers for my teeny tiny bits and bobs, it’d be pretty easy to start that theme. I was hoping to make wise decisions to continue that theme as I moved forward.
Modifications:
gold door pulls
Firstly - and I’d love to know where you have yours - I used Command strips to attach my DreamBox Crown light switch to the side of my DreamBox, as I walk into the room. It’s easy and convenient. I live in the frigid north so it’s dark a good portion of the time that I go to use the DreamBox. Also, I was told not to use the crown if I was making the modification that I did. Since the DreamBox is in a small room, against a wall, and will not be moved from that spot, I threw caution to the wind and added the Crown. I understand the risks. I’ve also purchased L brackets to reinforce the top and the middle wall.
contact paper
I swapped out the silver door hardware with some simpler gold/brass handles. It matched the aesthetic of my gold and pale teal office a little better. It also matches the wallpaper better as well. (door handles - the two pack isn’t available) (wallpaper - Spoonflower - appears to be discontinued)
Interior wallpaper. I bought my DreamBox around the time that some people started adding creative contact paper to their boxes as a way to personalize them. I loved the idea and fell in love with this geometric gold paper. (contact paper - I used 3 rolls)
For those of us who still have the fold up legs for the table, someone on the Facebook page suggested using Command Broom and Mop Grippers to keep the legs in place. I have added them and absolutely love them.
moppe storage containers + fairy lights
This is where you’ll notice the biggest modification. I already had, and was heavily using, these 4 Ikea Moppe storage boxes. When I did my measurements, I noticed that they were just under half the length of the DreamBox interior. I was ELATED when I figured out I could modify the box in order to keep using these storage boxes. I painted them white and added drawer pulls (1, 2) that also had labels on them. I mixed up the sizes of the drawers and the handles themselves in the hopes of creating an eclectic style. I also added fairy lights. I don’t think it adds anything, stylistically, but they make me happy. They’re USB compatible and you can turn them from soft white to multi-color to be a bit more festive. Oh, and the lights have a remote control so you don’t have to reach into your box to turn them on or off.
I spraypainted my small InView totes white and glued drawer pulls onto them. Most of these are used for my frame stickers or different tapes.
diy narrow magazine holder
I also built some thin magazine holders for sandpaper sheets and the very small assortment of scrapbook paper that I have. The 1/8 inch balsa wood doesn’t hold together well, so I added these brass supports. Honestly, I’m not happy with the way they look… I might move the drawer pulls down. If someone has a laser cutting machine and would like to collaborate in creating more, I can send you the measurements with some interlocking dovetail details to hold it together.
I use a Dremel and the Drill Press. I’ve used it to polish and drill holes into jewelry and for other random projects. The Dremel came with a ton of little pieces and drill bits. I use a bamboo makeup organizer to keep all the Dremel pieces organized. I painted it white and added drawer pulls.
I added a flat paper-holder for drying resin molds (mostly to keep cat and dog hair out of them). I think you can get one from Create Room, but it was unavailable when I purchased mine.
awesome boxes
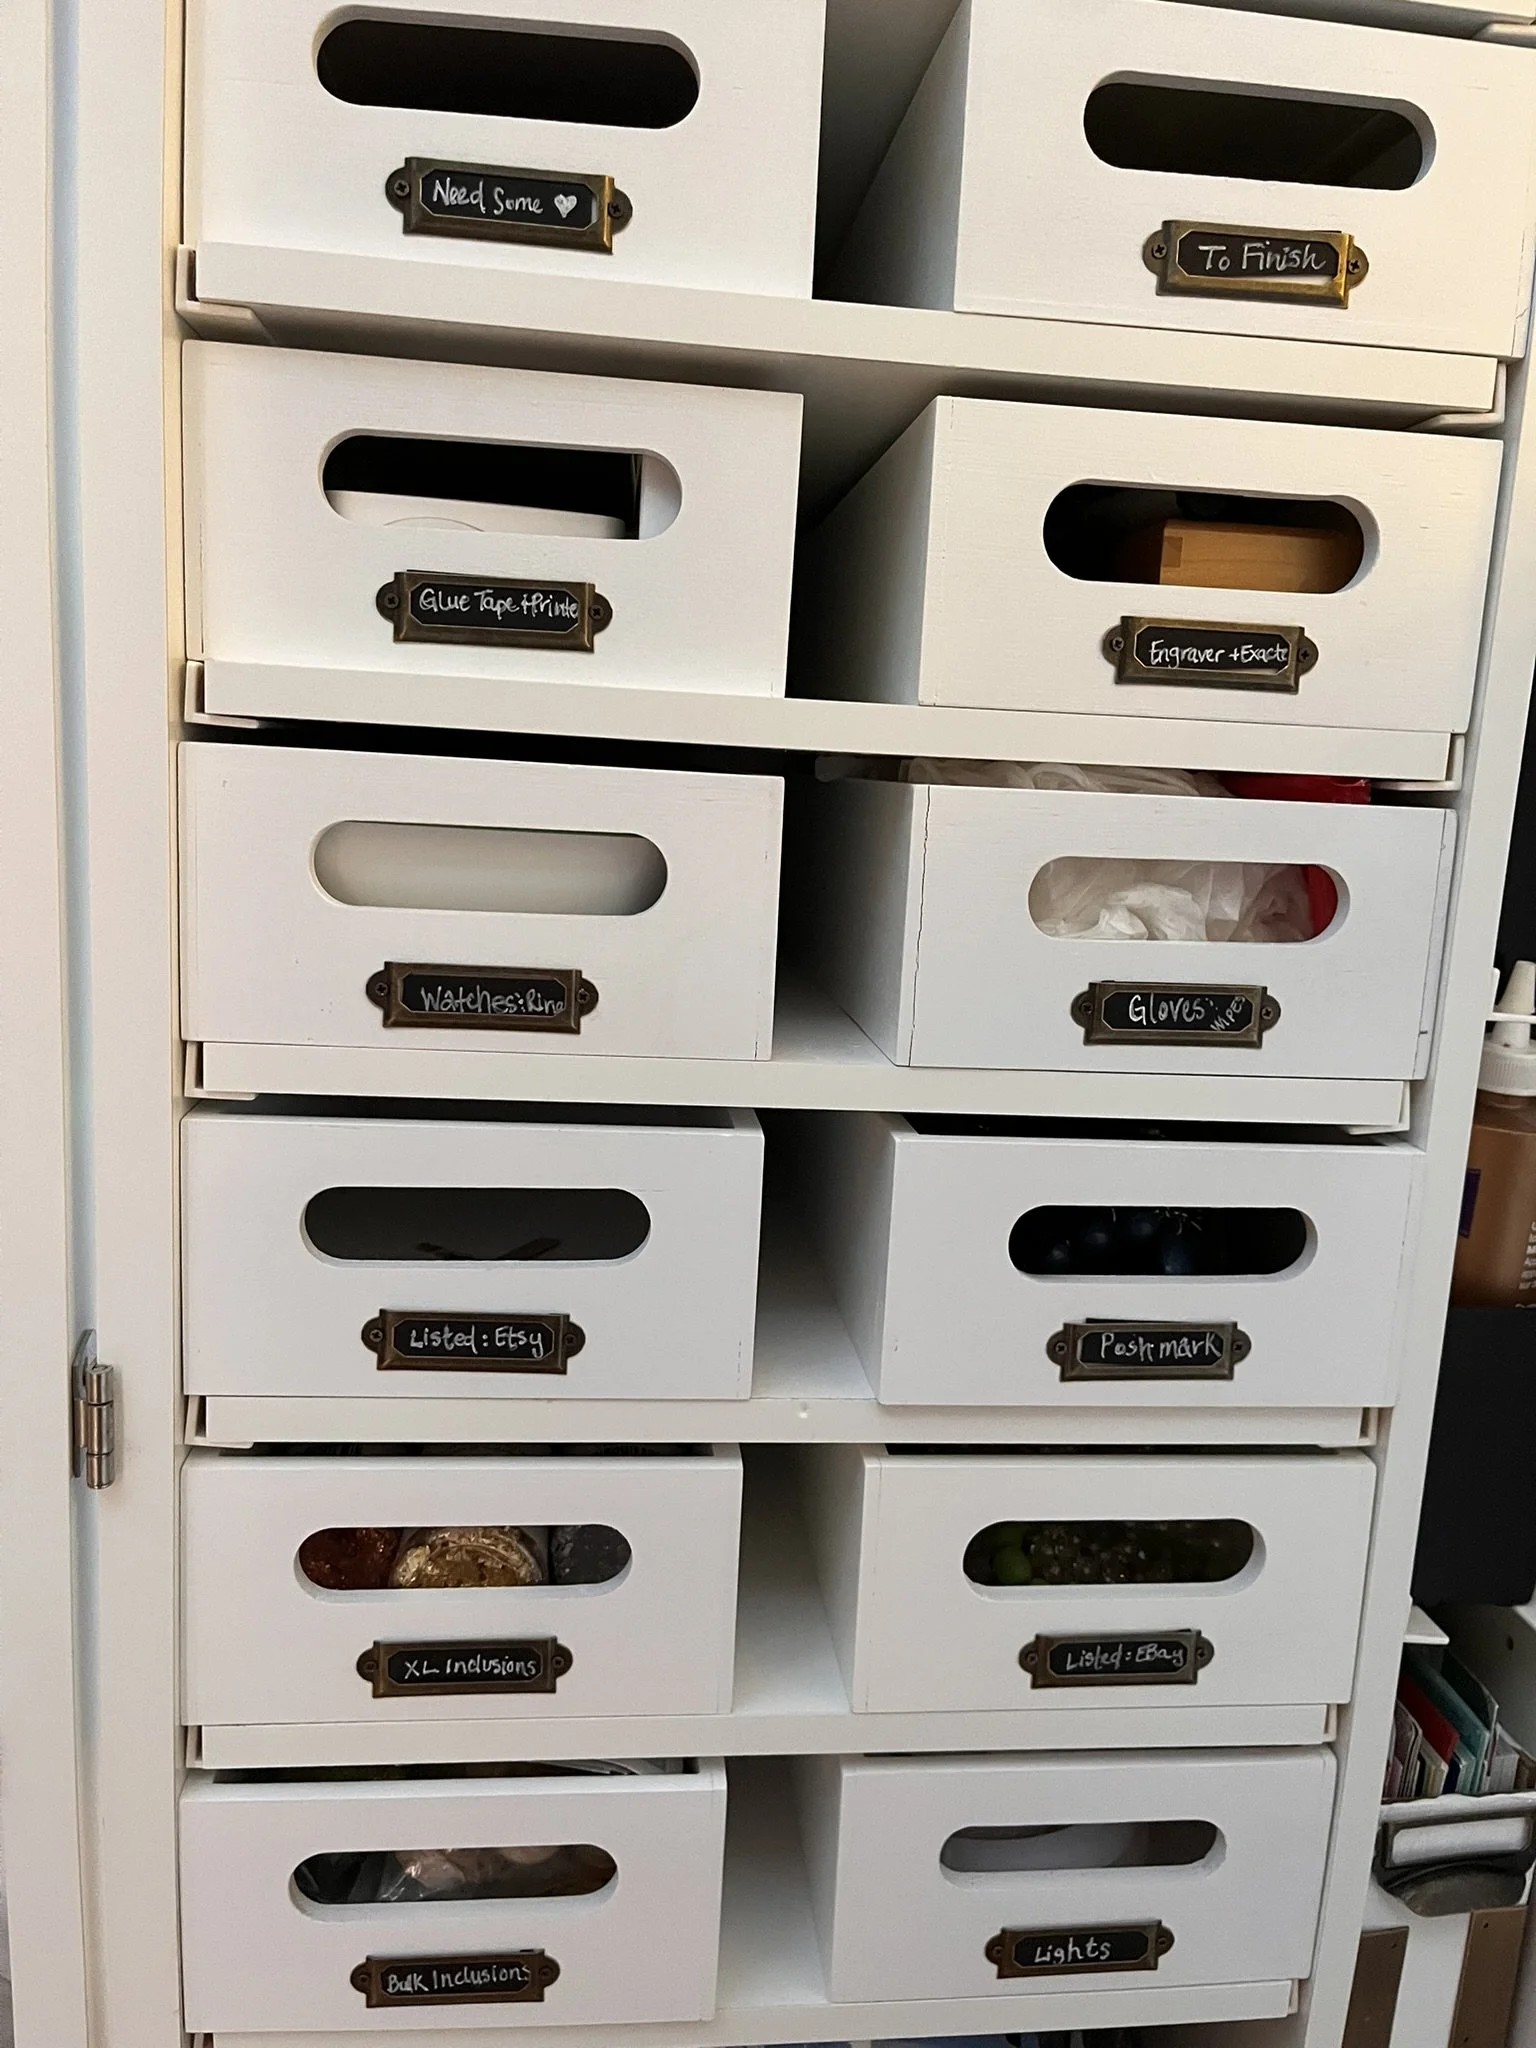
I found these awesome boxes that fit two to a shelf (note: they went out of stock but these ones are similar size). They were already painted white, but I added chalkboard signs to some and small library signs to others. I didn’t add chalkboard signs to all of them because I couldn’t pull the boxes out if I added them.
I had two large wire baskets for my paints and for some larger molds and project pieces. They already, conveniently, had holders for signs.
I have several antique metal locker room baskets that I use for random craft items. (similar size boxes) I cut the chalkboard signs, punched holes in the sides and tied them to the wire locker room baskets.
Since my locker room baskets were only 9” wide, there was enough room to add bamboo boxes along the side for oddly shaped projects.
jewelry stuff and necklaces
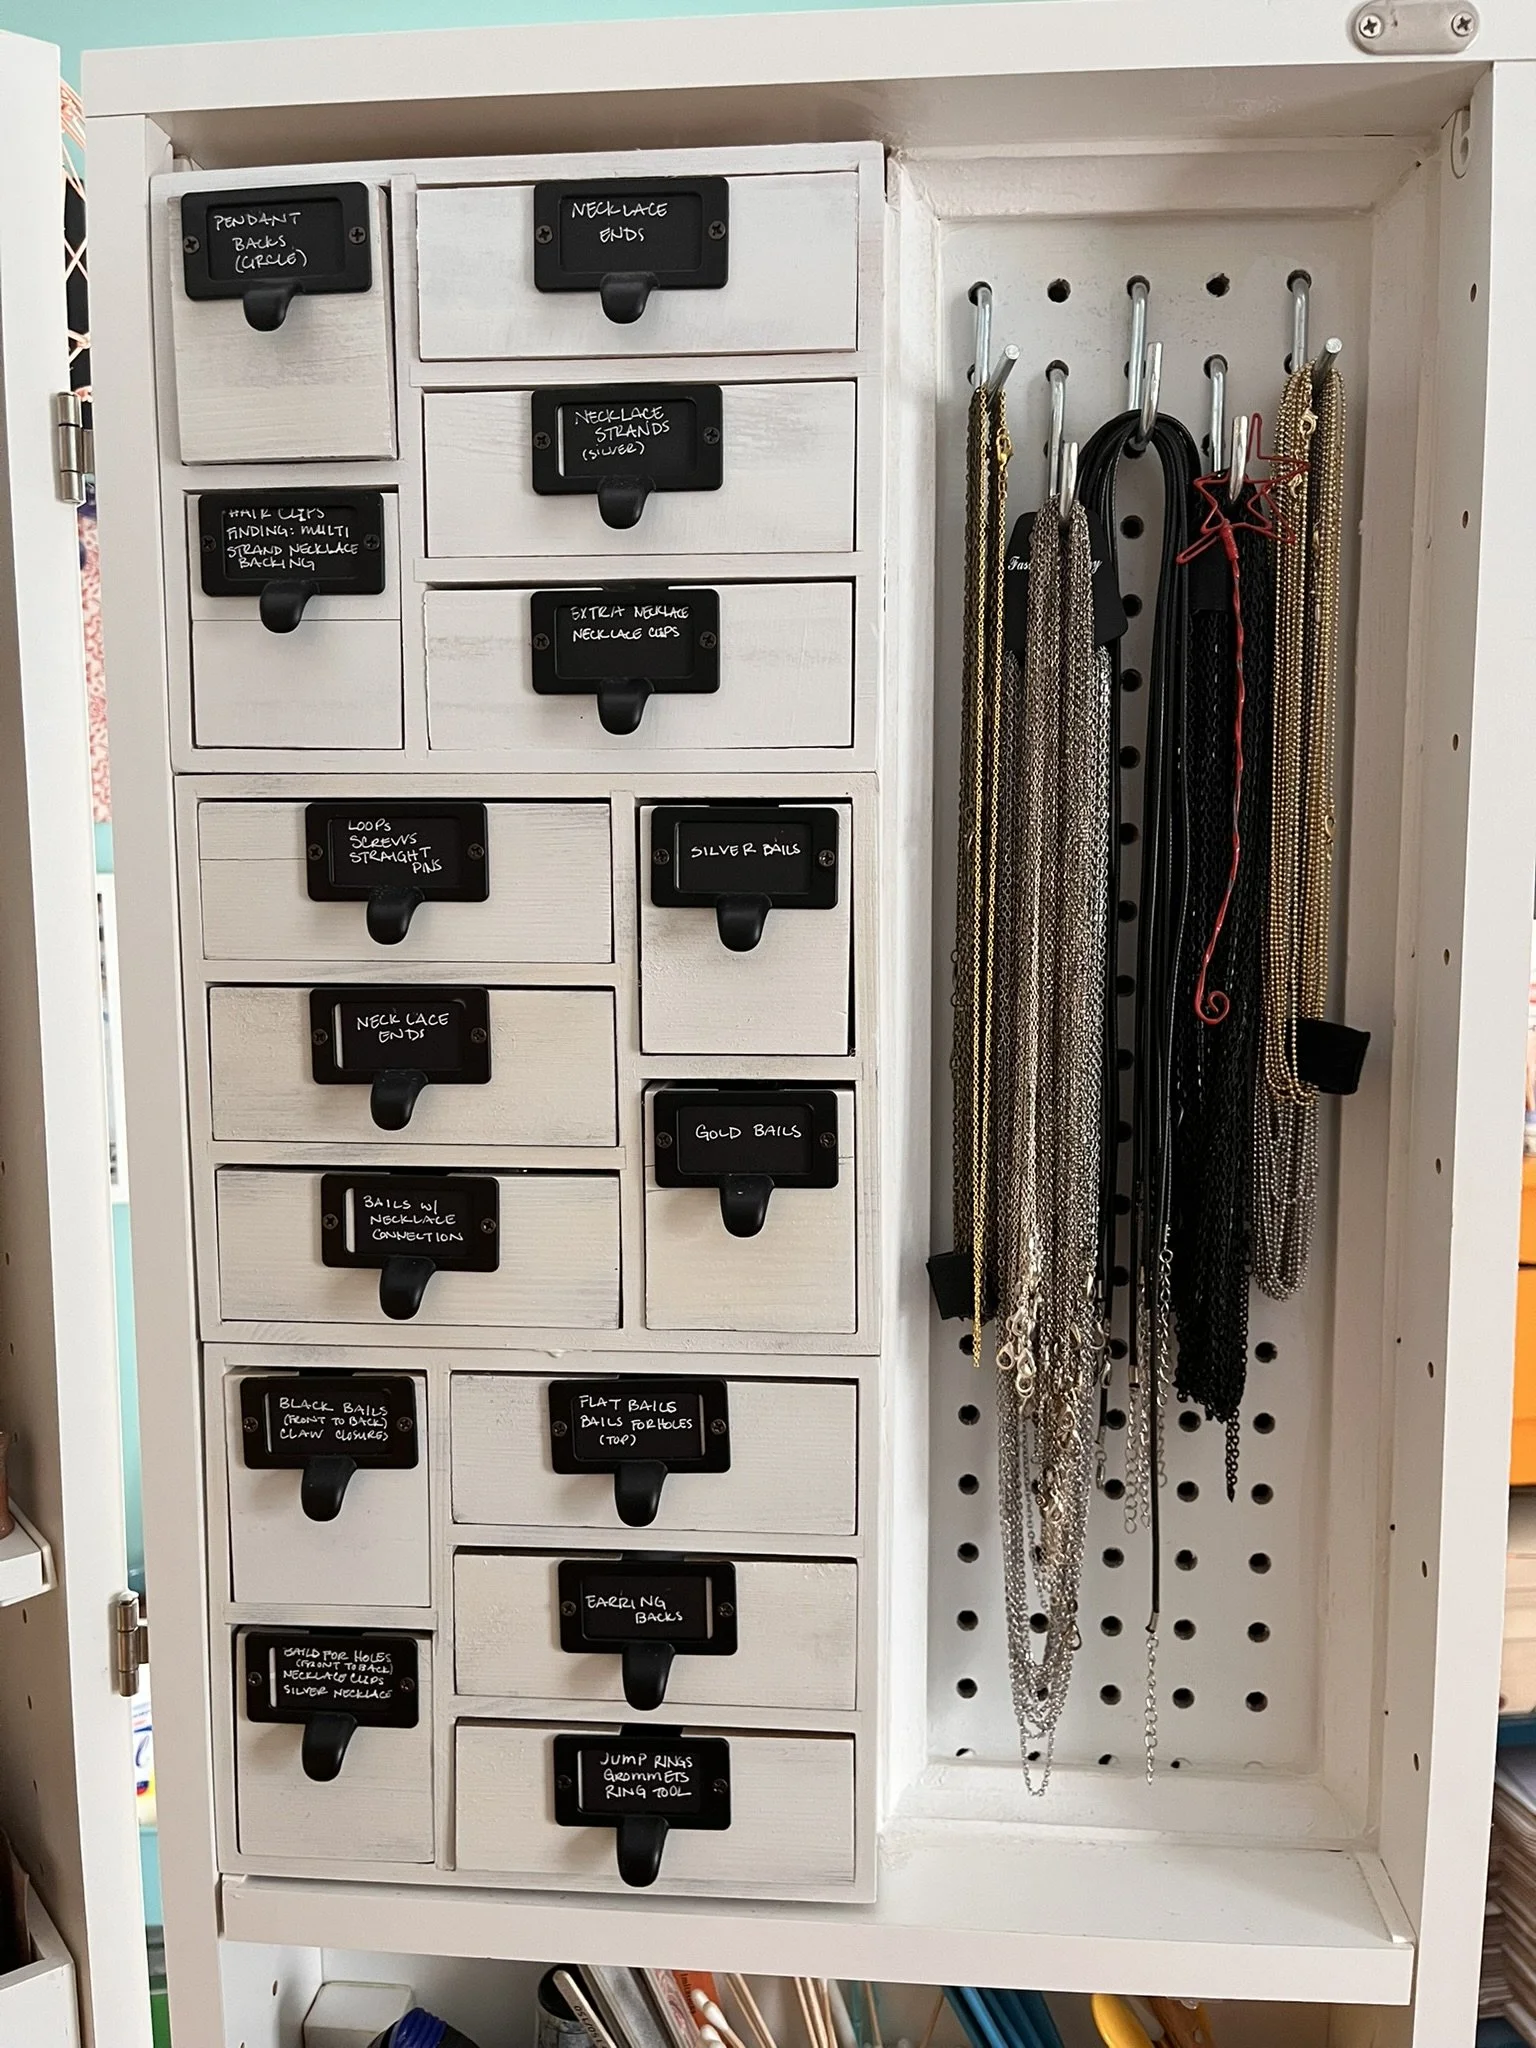
Since I make a lot of jewelry, especially necklaces, I need a lot of odds and ends (chains, clasps, bails). I had these little drawers to keep all the little pieces organized and within easy reach. I painted these white, glued them together, added labeled drawer pulls and set them into the door. I then added some white peg board and trim to keep it in place. I bought the peg board and trim from my local hardware store. For this pegboard I used “J” hooks to keep the necklaces straight and untangled.
Under that I utilized the full width of the door to put in more pegboard. In addition to “J” hooks, I used a pliers holder, and 2” pegboard hooks with rubber tips. If you’re curious about installing your own pegboard, let me know. I can put together a step-by-step of what I did.
tool pegboard
At the very bottom I used a paint brush holder for paintbrushes and other small tools that I couldn’t add onto the pegboard.
On the other door I added some colorful masking tape. I confess it’s more for looks than practicality. They’re so pretty!
rollers for paper roll
Below that, I added a paper roll. The paper roll is almost as long as the door itself, so I couldn’t just put it on a DreamBox Rod. Instead, Fancy Boyfriend™ 3D printed me some rollers. I found rollers of the same size on Amazon, here. I slipped the rollers or spacers onto the DreamBox Rod, and then set the roll on top of the rod with rollers. I can then pull the paper out really smoothly. In order to tear the paper, I’ve added an acrylic guard to rip the paper at length. Looks like you can’t buy the acrylic guards individually, you’d buy extras as part of the Swing Door Upgrade Kit. I use the paper to set down when I’m working with resin or painting. It’s really handy if you have the space on your door.
I used random jars I’ve gotten over the years to store various inclusions and beads that I have in bulk. Even an antique ball jar that I found in New York when I was working out there.
Lastly, I’ve used several acrylic guards for a slate Lazy Susan (for pictures) and plastic plates that I use for painting pallets. If you’re wondering about the Murphy’s Soap, it works wonders on paintbrushes with dried on paint. It also conditions the bristles very well!
Since my office is so small, I cannot open my DreamBox completely, as a lot of other folks have done. I’ve found, though, that I don’t need to. All of the tools I need within reach are stored in the swing doors at eye level when I’m sitting down, so it’s perfectly laid out to help me do my work efficiently.
I hope that you’ve gotten some inspiration on how you can organize your DreamBox to meet your needs!
Please note: some links above are affiliate links that may result in receiving a small kickback from Amazon should you choose to purchase it. Thank you for helping fund my DreamBox addiction.


